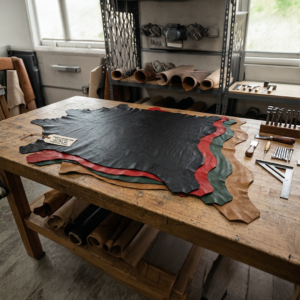
There’s something deeply satisfying about pulling a wallet from your back pocket and remembering you made it yourself. A DIY lambskin leather wallet is the perfect first leather project — it uses very little material, teaches every fundamental skill (cutting, stitching, finishing), and produces something you’ll actually carry every day. Best of all, lambskin is the most forgiving hide for beginners because it’s thin enough to cut with a sharp utility knife and soft enough to stitch by hand without specialized awls.
This tutorial walks you through the full build, from picking your hide to your first day of carry. Set aside about 4 hours, pour a coffee, and let’s go.
Why a DIY lambskin leather wallet is the perfect first project
Most beginners are tempted to start with thick veg-tan cowhide because that’s what tutorials on YouTube use. Don’t. Cowhide is unforgiving — every cut shows, every stitch needs a pre-punched hole, and a single mistake usually means tossing the piece. Lambskin is the opposite. It cuts cleanly with a hobby knife, takes a needle without pre-punching, and forgives small irregularities because the leather drapes around them.
If you’re not sure why lambskin is so much easier on beginners, our breakdown of lambskin vs. cowhide explains the fiber differences in detail.
Tools and materials you’ll need
- 1 sq ft of Grade A lambskin (about half a small hide)
- A sharp utility or rotary knife
- A metal ruler (cork-backed if possible — it doesn’t slip)
- Self-healing cutting mat
- Waxed polyester thread, 1 mm
- Two harness needles (size 002 or 004)
- Bone folder or burnisher
- Beeswax or edge paint
- Binder clips (your “third hand”)
Total cost if you don’t already own anything: around $35–$45. Most of it you’ll reuse on every future project.
The pattern: download and prep
For a basic bifold, you need three rectangles: an outer shell (8 in × 4 in), an inner liner (8 in × 4 in), and two card pockets (3.5 in × 3 in each). Trace these onto paper first, then cut. Always work with the leather grain side down when transferring patterns — pen marks will rub off the suede side but stain the smooth side permanently.
If you’d rather learn from a worked example before designing your own, browse our gallery of 9 proven lambskin craft ideas — three of them include simple wallet variations.
Cutting your lambskin pieces
Place the leather flat on your cutting mat and lay the metal ruler firmly along your pattern line. Cut in a single confident pass with the knife held vertically — never sawing, never two strokes. Lambskin is so soft that two passes will leave a ragged edge. If the leather wants to slip, weight the corners with quarters or magnets.
Cut all four pieces, then label the back of each one with a pencil so you don’t mix up shells and liners.
Hand-stitching for clean seams
Use the saddle-stitch technique: thread two needles on opposite ends of one piece of waxed thread, then stitch through each hole with both needles in opposite directions. This creates a stitch that won’t unravel even if it gets cut. Aim for 6–8 stitches per inch — fewer for a rustic look, more for a refined one.
Lambskin doesn’t need a stitching chisel for the holes; a simple awl or even a sharp needle will go through cleanly. Mark your stitch line first with a wing divider held about 4 mm from the edge, then poke holes along the line at even spacing.
Burnishing and finishing edges
Raw lambskin edges are slightly fluffy. Slick them down with a bone folder, working a tiny dab of beeswax into the edge in long firm strokes. The friction smooths the fibers and seals them. For colored leathers, edge paint gives the cleanest finish; apply two thin coats with a small brush and let each cure overnight.
Breaking in your wallet
A new lambskin wallet feels stiff for the first day or two, then molds to your pocket and your card collection. Resist the temptation to over-stuff it during the first week — that’s how creases become permanent. After 7 days of normal carry, condition the outside with a light leather cream and you’re set for years.
Shop Premium Lambskin Leather Hides
Looking for the perfect material to apply these DIY lambskin leather wallet techniques on? Our Grade A lambskin hides come in 8–10 sq ft pieces, hand-selected for soft temper, even grain, and consistent thickness. Available in black, beige, dark green, red, and tobacco — perfect for jackets, bags, wallets, and craft projects.
Frequently Asked Questions
How much lambskin do I need for one wallet?
About 1 square foot of leather is plenty for a standard bifold, with extra to spare for mistakes. Our 8–10 sq ft hides are enough for 8 to 10 wallets.
Do I need a sewing machine for a lambskin wallet?
No — hand-stitching with a saddle stitch is actually stronger than most home sewing machines, and beginners get cleaner results by hand on lambskin than on a machine.
Can I dye my lambskin wallet a different color?
Yes, but choose a leather dye specifically labeled for soft hides. Apply with a wool dauber in thin coats and let each layer dry fully before adding the next.
How long should a hand-made lambskin wallet last?
A well-stitched lambskin wallet typically lasts 5–10 years of daily use. Compared to mass-produced wallets in the same price range, that’s roughly double the lifespan.